Me and a friend have just written a tutorial on how to get all the content from L4D, including entities, models and materials into hammer. It should work, and it won't mess up your current settings!
Step 1 - Creating a new mod
Open up Source SDK. Choose The Orange Box as the engine, and press "Create a Mod".
Choose Half-Life 2 Multiplayer. Now fill in the directory. Doesn't matter where you install it. I choose to install it C:\Program\Left4Fake\. Name; Left4Fake. The name is totally random and you can put in whatever you want.
However, I recommend that you do now put Left 4 Dead, or Left4dead. Since it might screw up your SDK when the official SDK is released for L4D
When its done copying the new files, click continue and then next. Now close down Source SDK and follow the step below.
Step 2 - Extracting Materials and Models
Files Needed
-VPK Extractor(
http://blog.gib.me/wp-content/upload...ctpackage2.zip)
Okay, now you need to add the materials and models from l4d to your new mod. Download the VPK extractor
and run it (Green Icon). Now press extract and find the file called "pak01_dir.vpk" which is in this
directory;
drive:\Program Files\Steam\SteamApps\Common\left4dead\left4dead
Then another browse box will come up. Now find the mod you just created in your SourceMods Folder (SteamApps\SourceMods\Left4Fake) and press ok. The process of extraction can take around 10 minutes, so don't worry if it takes a while. Now if you were to open your mod with hammer you would see the new textures, but no new models or entities. That's what we are going to fix now!
Step 3 - Fixing the models
Files Needed
-Name Changer Bat(
http://www.savefile.com/files/1908708)
First off, you need to download the above file that I've created, and Corion on L4Dmaps.net has written the code for. It will change the model names so they work with the current hammer.
Extract this .Bat file to your mod model folder, where you have extracted the L4D models (SteamApps\SourceMods\Left4Fake\models\). If there isn't any models folder, you've done something wrong :S.
Now Run this file, double click it and a new batch window should pop up. This process will take a while, it copies and deletes different files to make the models work for you =).
When it is done, you should now have working textures and models in hammer. Although, something is missing, doesn't it? Oh right, the entities, well, lets get started on that then
Step 4 - Adding the Entities
Files Needed
-Left4Dead.fgd(Link) - Thanks to Terrenteller for that.
The final thing to do here is to add the entities. Lets start by downloading the left4dead.fgd
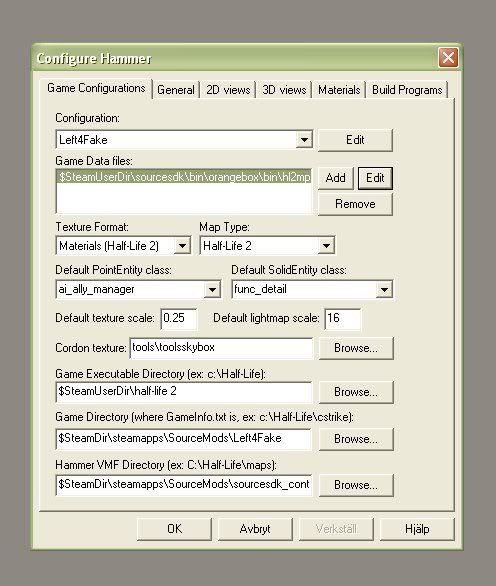
Open up hammer, with your custom mod selected. Go to Tools>Options
and a new window should pop up.
It should look something like this:
Now add the left4dead.fgd that you downloaded. It should look like this after;
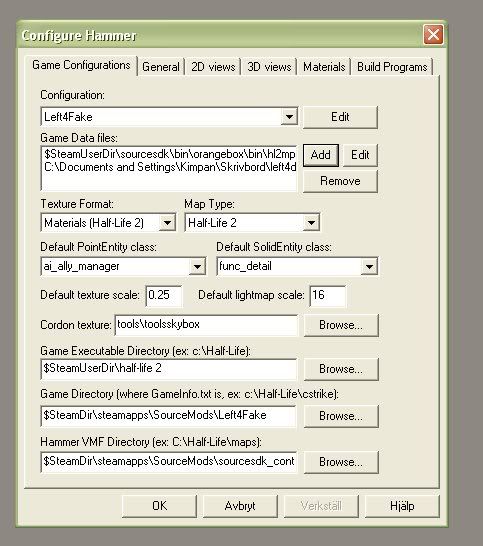
I have my .fgd on the desktop, not in the same directory as the other .fgd's or my mod.
Step 5 - Making Hammer automatically launch L4D after Compile
Welcome to the final step, to make Hammer launch Left 4 Dead after you have compiled your map, this will also save your maps in the maps folder. Open up the options menu again.
The other options should be following;
Game Executable Directory:
$SteamDir\steamapps\common\left 4 dead
Game Directory:
$SteamDir\steamapps\common\left 4 dead\left4dead
Hammer VMF Directory:
$SteamUserDir\sourcesdk_content\l4f
You'll need to create a new folder.
Step 6 - Restart Hammer and Enjoy!
Guess what? Your done, enjoy the new hammer and don't forget to say thanks to the below people!
Special thanks to:
Fearlezz
Occlusion
NovaSilisko (at l4dmaps.net)
Corion (at l4dmaps.net)
www.l4dmaps.net


 Zitieren